I recently decided enough was enough with this mess! Our storage compartment was out of control. With a little brainstorming and the use of scraps around my house, I was able to convert our front storage compartment into a space that is easy to use!
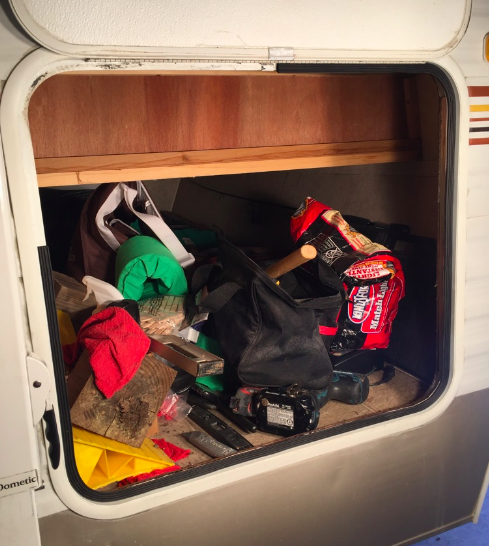
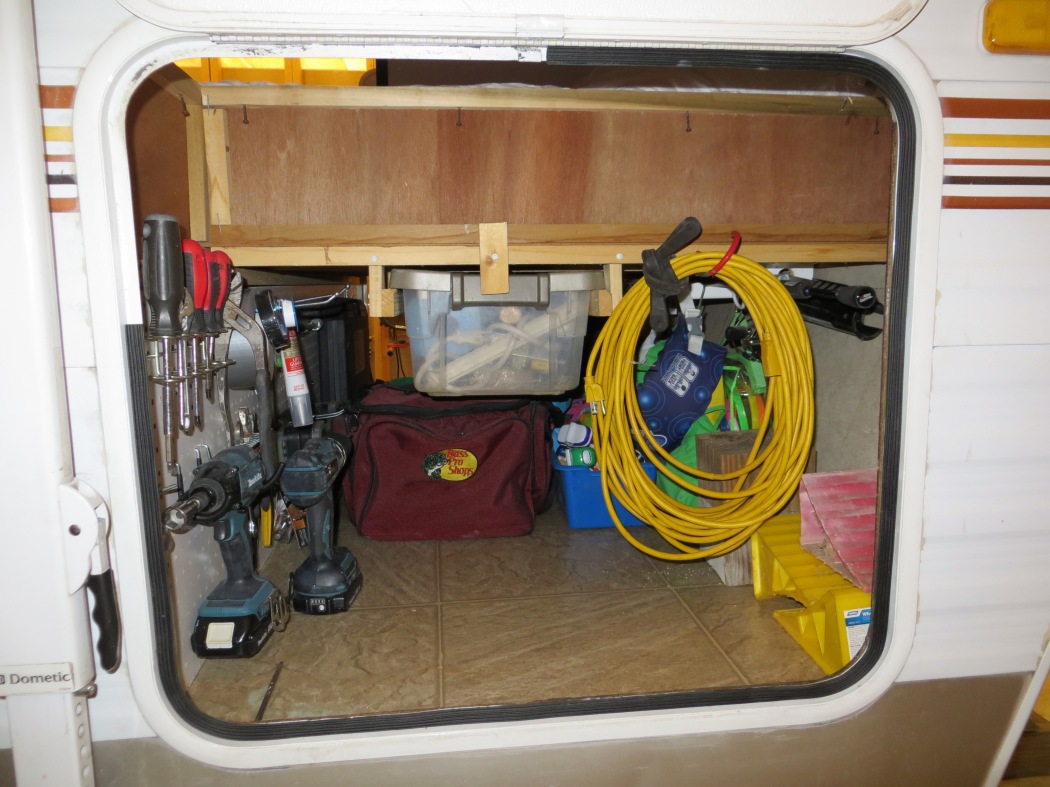
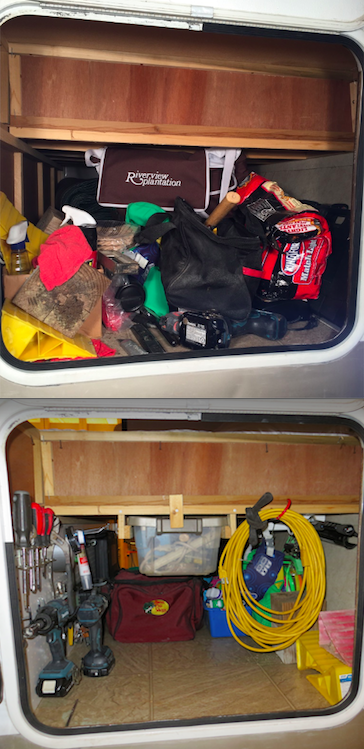
First step was taking everything out! It was a disaster: grilling kit, tools, chairs, pool toys, charcoal, fishing poles, you name it.

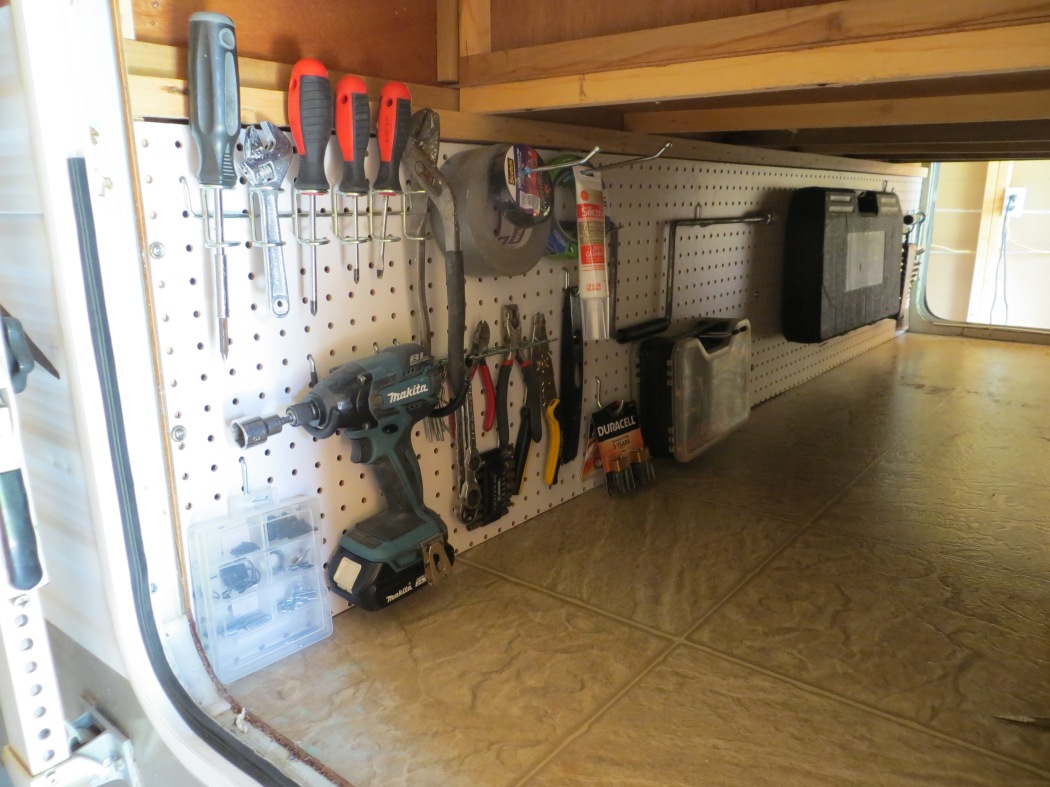
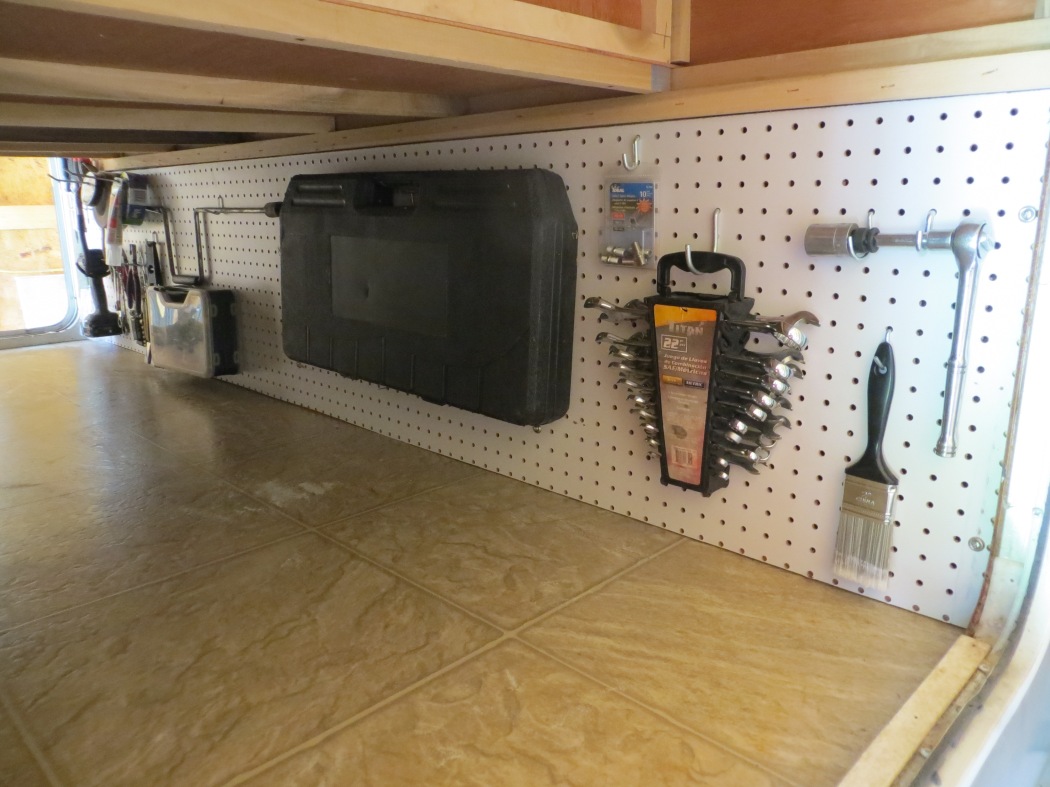
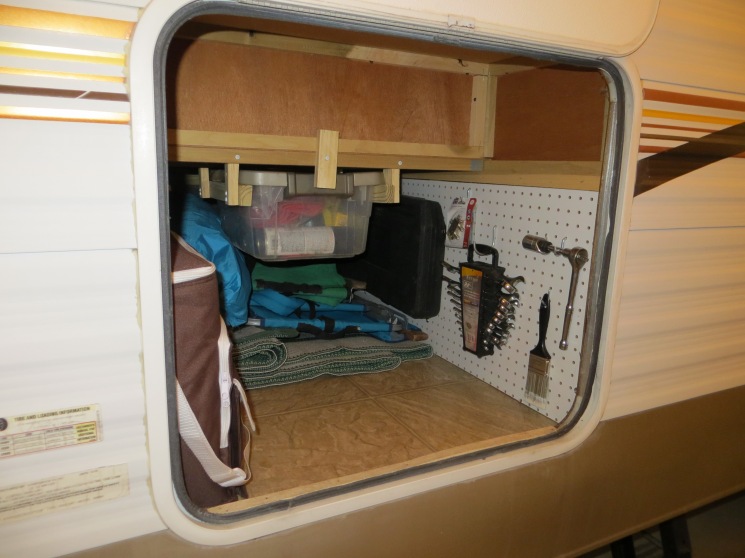
The current design was just a huge rectangular space. We used some plastic bins, but they were still chaotic. You weren’t ever sure which item was in which bin. I needed a way that I could easily grab tools for set up and maintenance. This gave me the idea to use pegboard. A few 3/4″ screws and some finishing washers and the pegboard fit perfectly! If you don’t have a table saw, Home Depot will cut pegboard for you.
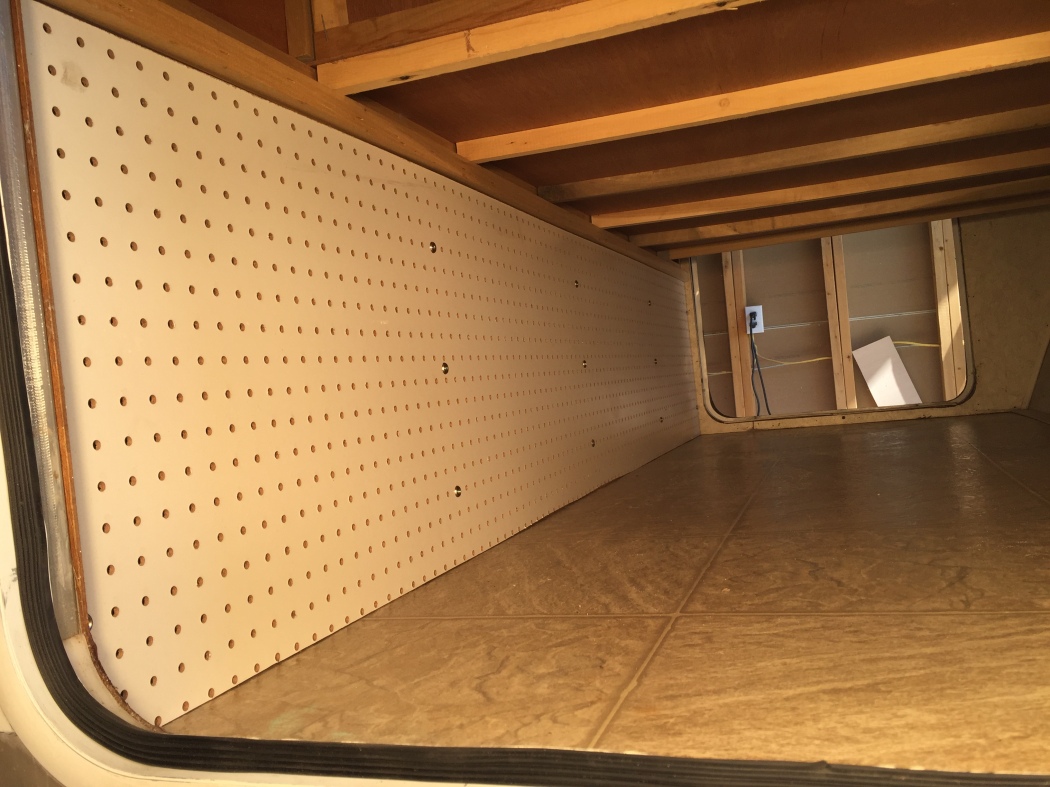
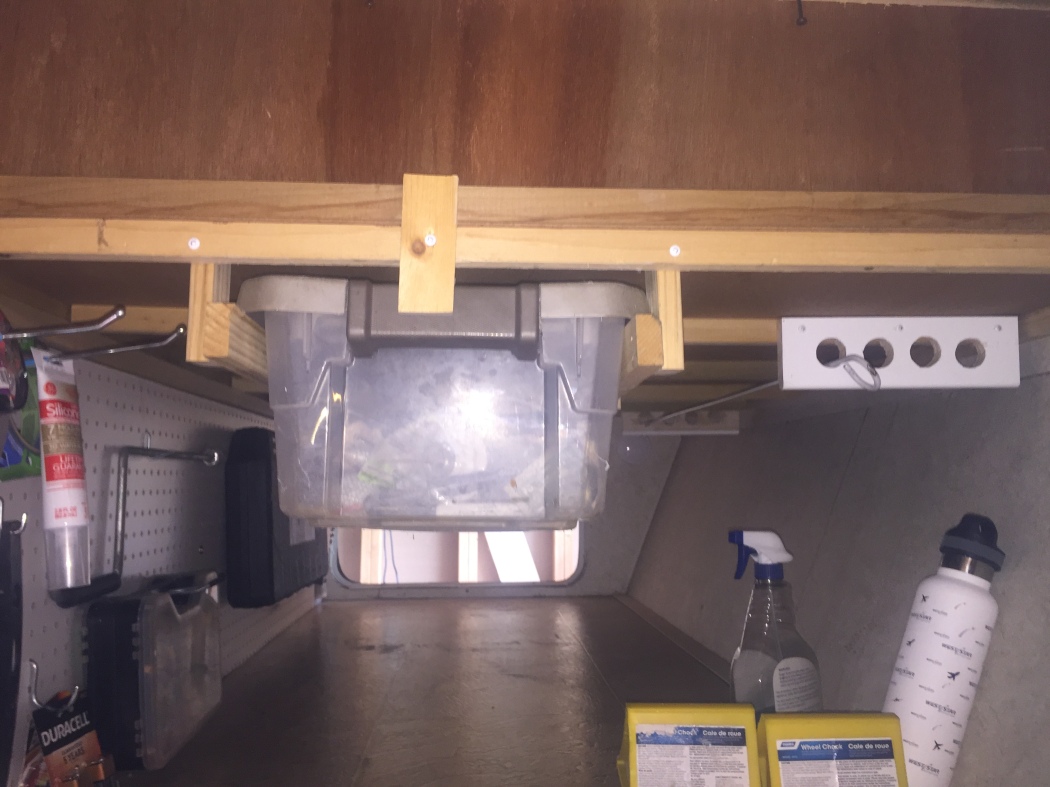
I also decided to suspend a plastic bin on either side that could slide in and lock into place. The passenger side bin is used for tools while the driver side is for cleaning supplies.


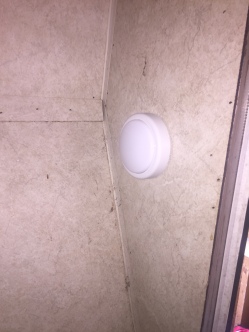
I added two push-button lights from Home Depot ($5.90). It is crazy that modern RVs don’t have lighting in the storage compartments.
I organized my tools on the peg-board. Believe it or not, this was quite time consuming. Then I added two boards with circle cut-outs for hanging fishing poles and an awning rod.
Last step was to put everything back in! The total project time was about 4 hours.
Before and after!


Great ideas, do the tools stay on the pegboard while towing?
LikeLike
So far no issues with tools! The pegboard attachments come with plastic locks. We have our first big trip next week. I’ll let you know if we have any issues.
LikeLike
Pam, just finished almost 600 miles and nothing has moved! Very happy with the pegboard.
LikeLike
What did you use to attach the pegboard?
LikeLike
Meredith, great question! I used 1/2’ stainless panhead screws with finishing washers. Careful with screw length so you don’t screw through the thin bed frame. Other than that it’s very easy!
LikeLike
Great Idea !
LikeLike
I love what you did! Mine looks so bad. Thanks for showing me how you fixed yours.
LikeLike
Great idea I think I’m going to try this …Thanks!!
LikeLike
What a difference!! Love it!
LikeLike
Looks GR8 thanks for the share. Mine is finished top to bottom so framing in the plastic bins will be fun. Mine does have lights in it as well but I’ll jus cut round holes in the peg board so they stick through.
LikeLike
I think this is just what we need! Thanks for the info!
LikeLike
I’ve been looking for great ideas, now i have them. Thanks!!
LikeLike
Bought a new 19RBHL and this will be my first upgrade. Thanks!
LikeLike