- Not having the right tow vehicle for the job. Growing up in the RV industry, time and time again I saw customers walk through the door looking defeated because another dealer had sold them an RV they couldn’t tow. After realizing their mistake, many were forced to decide whether or not to downsize the RV or upsize the truck. Unfortunately, most realized trucks are way more expensive so they took a hit on the RV and either walked away from camping completely or downsized and took a bath in residual value. Before purchasing, familiarize yourself with the terms GVWR and GAWR, rear end ratios, tongue and pin (for fifth wheel buyers) weight limitations, and tow guides. RV Life publishes and annual tow guide with realistic values based on options and packages. Do your homework and don’t make a $10,000 or $20,000 mistake! Also, if you are planning to do a lot of mountain camping and steep-grade towing, allow an extra 20% weight factor for your tow vehicle.

2. Using stabilizer jacks to level the RV
These jacks were not designed to carry the weight of the RV. They are simply there to make it stable. Trying to raise one side of the RV 2-3 inches or more could result in damage to the jack, mainly the jack screw. The higher the stabilizer jacks are, the less stable they become. Bring some 6″x6″ wooden blocks so you don’t max them out. Also bring 3-4 2″x6″ or 2″x8″ boards long enough to go under both wheels. Back the RV up on these boards to level the camper. If you need more than two then you might need to consider a different location.

3. Misunderstanding of proper awning use and care.
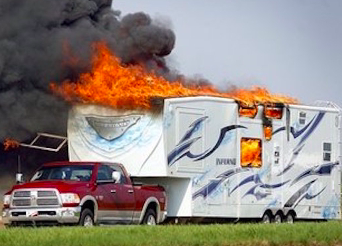
- Failure to close the awning when unattended. Awnings are great but not meant to handle wind. Forget to close the awning at night or before you leave for dinner and you may return to a $1,000+ mistake.
- Angling the awning away from the door or failure to angle it at all can cause it to fill with water and break. Also not having the awning higher than the top of the door will rip the fabric. Fabric will cost $600-$1,000 minimum to replace so become familiar with your door height and proper setup adjustment.
- Not cleaning or allowing the awning to dry. Over time the awning will mildew and become near impossible to clean. Always allow the awning to dry thoroughly before closing. If you can’t wait, air it out within a day or two and clean with a 20/80 bleach/water mixture.

4. Packing too much stuff!
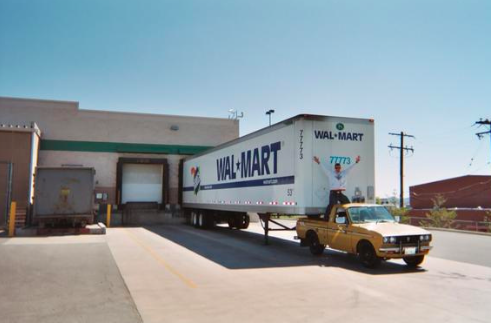
Packing your RV with 1,000s of pounds of food, water and supplies is a common mistake. Many first time RV’ers will fill their 20-30 gallon fresh water tank, pack groceries, bottled water, coolers, and try to take all their modern conveniences with them. This will result in much lower gas mileage, poor towing stability, possibly even overheating if you are in a mountainous area. Even if your tow vehicle can handle it, it makes way more sense financially and practically to wait and get as many supplies as possible when you get close to your destination. Learn to minimize what you need and leave the heavy things at home. On a side note, it gets way more violent in the RV then you might think. RV’s don’t have the shocks and struts that your car does. Pack your items as secure as possible and be careful opening cabinets when you get where you are going!

5. Misunderstanding of black and grey tanks
Not understanding how the sewer tanks work is very common. It can be a nightmare if you don’t do some reading. The dealer where you bought your RV likely explained using chemical and the proper paper products, but they probably didn’t explain what it feels like the first time you get raw sewage in your mouth at the dump station. They also probably didn’t explain to you how to change your shower habits so you don’t fill your grey tank up in 2 hours. This will be a learning curve. Just read as much as possible and be prepared with your sewer hose, attachment, gloves, etc. so you won’t feel so pressured to hurry the first time when people are waiting on you.

6. Not configuring your hitch correctly
I commonly see people who purchased used RVs from individuals that sell hitch heads and weight distribution systems with the RV. These components are fairly complex and should not be taken lightly. Having the wrong settings for your vehicle could not only effect gas mileage but could create a major safety issue. Call a reputable dealer in your area and pay their service department for an hour ($100), to inspect your ball height, set your weight distribution up properly, show you how to tighten the sway control and set your brake controller. You’ll be very glad you did!

7. Not removing your sway control prior to backing
In our service department we had an entire pallet full of bent sway controllers and hitches from people forgetting to remove them prior to backing into a tight spot. Backing straight back likely won’t cause any issues. However, if you try and make a sharp turn to back into a tight spot then you’ll probably bend something!

8. Not practicing backing prior to your first trip
Many people drive to their first campsite and realize they have no idea how they are going to back their camper into a tight spot. Take some time prior to your first trip and go with a friend or spouse to an open parking lot and get some practice. Use your watcher and develop some good hand signals. There is nothing more frustrating or embarrassing than being in a campground full of prying eyes and struggling to back your trailer into your campsite. Don’t rush things. Use a spotter and get some practice. Don’t be afraid to ask for help. You will find that other people in the campground are quite kind when it comes to helping and won’t pass the judgement you might think. The comradery among RV’ers is strong and we all had to start at some point!

9. Forgetting to properly configure your RV prior to driving
I can’t tell you how many times I’ve seen emergency windows broken because they weren’t latched, TV antennas broken on a low passage, broken stabilizer jacks, severed power cords or water hoses, etc.
Do yourself a favor prior to camping the first time, do a dry run and practice. Then create a checklist. Run through the checklist prior to driving away. This simple practice will not only make you more efficient, it will also potentially save you a ton of money and loss of use!
10. Not properly maintaining your RV
This point is huge and very expansive (could be its own post) but here are the main points:
- Tires, pressure, and lug torque should be checked prior to every trip. Just because the tire has plenty of tread doesn’t mean the tires are safe. Those tires might be 10 years old and full of dry rot. If you have a tire blow out while on the highway, it’s not only frustrating but it can cause major damage to your RV.
- Not sealing the roof. The leading cause of RV damage is water. Failure to seal the roof every 3-5 years WILL result in extreme depreciation of your asset. EPDM rubber only has a 10 year life. Storing your RV under shelter is the only way to keep it from sustaining water damage and prolong the roof life.
- Failure to winterize is extremely common. Just because your RV has the “Polar” package that a salesman touted doesn’t mean your faucets and lines won’t freeze. What it does mean is that when it freezes you’ll have to pay double to have the polar underpinning removed for repairs. Don’t risk it! Learn to properly winterize yourself and if you think it’s going to be below freezing, winterize it.
- Don’t turn on your water heater without water in it. Yes, this is common. It will burn out the element and be expensive. It can also cause a “hot skin” condition where you have open voltage through the rv.
In conclusion, ask a lot of questions when you buy your RV and read as much as you can! If you have questions you can always email us!!!


What rubber roof sealer would you recommend?
LikeLike
Chris, I would recommend a self-leveling lap sealant. There are a ton of different brands. Generally Amazon has great deals on the Dicor brand. Email us at glamperlove@gmail.com if you need help or specific questions with your project! Good luck!
LikeLike
Thanking you for all of the great advise, I’m a lady on my own where would I tear my outfit to have the tow hitch ect checked out ? Again thanking you
Marie🌻
LikeLike
Marie, where are you located? I’d recommend doing a quick search of reputable dealers in your area and make sure to read the Google reviews about their service department. After determining they care about their customers, call and ask if you can pay for a 1/2 hour to 1hr of labor for them to look at your setup and determine if it’s the best for your vehicle. They should also use this time to teach you how to properly hook up and set your brake controller, sway controller, and equalizer bars. Don’t be surprised if you call a few dealers before finding someone that really cares.
LikeLike
Thank you SO much for this article! We just bought our 1st travel trailer and are a little apprehensive about where to start and making sure that we take good care of our investment.
LikeLike
JM, good for you! The best thing you can do is find a copy of the owners manual (if you don’t already have it) and do your best to follow the inspection intervals. You’ll likely find that many if the items you can do yourself! If you have any questions please don’t hesitate to email us.
LikeLike
Thank you so much for all of the wonderful information.
I lost my home in hurricane Harvey and I’m now living in a 36 foot travel trailer. And I am learning a lot. Already had an incident with the gray and black water.
Thank you again For all of the great information
LikeLike
Pati, we greatly appreciate the kind words! Sorry about your loss but it sounds like you’ve made the best of it!
LikeLike
This was great information and some we figured out right away. Friends who were RVers give us great advise. The one we missed was turning the water on the first time after month in storage and started leaking. What a mess. My husband got it sealed and hopefully we learned a lesson w/that one!
LikeLike
[…] in the digital world. Some links, like finding out my HHR’s capacity, have been long lost. But THIS POST warns of over-packing, setting me on my journey to ensure my F-150 could handle what my family […]
LikeLike
Unfort, when pulling away from a parking area I scraped against a tree and it took a small chunk of the side of my 98 Bounder. Is there a easy to but filler, like spackle, to use for keeping the moisture out of the small 3 inch wound? Dang it
LikeLike
Oh no! Thanks for the question. Don’t feel bad, we’ve all been there at some point. About 5 years ago I destroyed a rear corner trying to maneuver in a parking lot at 2am. Assuming your Bounder and subject area is fiberglass, you’ll likely be surprised at how cheap this repair might be. Also, there are a ton of mobile repair companies that can do onsite repair of fiberglass. Just do your homework, get recommendations, and read online reviews first. Get 3-4 reviews and go with who you feel will do the best job at the best price. If you are currently on the road and need to do a quick fix to keep the area dry, I personally wouldn’t overthink it. Just cut a 6-8mil piece of plastic or weatherproof materiel such as Tyvec large enough to cover and then duct tape the edges. I’d stay away from a filler for now as it will likely cost you more money when you do the repair later. I’m betting there are also some awesome Facebook community camping groups in the city/region where you live that could make some good recommendations for a reputable repair facility or mobile repair!
LikeLike
One of the common mistakes I encounter is with the blackwater. I learned that with the tank is don’t leave your valve open even when you have sewage hookup at your site. It is best to allow tank to fill and then dump. That way the pressure built up in the tank will force any solids out instead of having to clean out later.
LikeLike
Great pointer, Cliff! Yes, this is a very common mistake and one that can lead to a lot of problems. I’ve found that one of the most misunderstood systems in an RV is in fact the waste tanks. We used to recommend a 70/30 ratio of water to waste and also recommended flushing no less than 10 seconds. I’m also a big fan of the after-market hose ramps so you don’t get low spots in your sewer hose on the way to the hookup. Maybe it’s time to write another “10 mistakes” blog and start with your pointer!
LikeLike
Good list but I would add knowing basic facts about your RV, things like it height. If you’re not sure find a ladder and tape measure, don’t forget anything on roof like the AC. Then write the hight down and maybe put it on a sticker some place the driver can read it. Also good idea to know the width and length, also the weight or your RV.
These basic facts could come in very handy if you come to a low bridge or entry into a holiday park.
LikeLike
I’m thinking about getting a used rv. I know absolutely nothing about what I need to look for in buying a used one
This article has almost made me change my mind about it. If I do buy one and set it on a friends property, what do I need to do. Any help whatsoever would be greatly appreciated.
LikeLike
Thank you so much we just purchased our new Rv and we had a dolphin affect going on. We had r RV hooked up to our new truck.:( at the RV dealer. Ford echo 3 4×4 sport truck. Rv Forset river vibe 28′ RL. 2019First trip may 9th 2019
LikeLike
great article.I am a senior that camped for years .now alone I tow an 11 foot vintage camper for fun . Do I need sway bars? I feel a pull only when a large rig roars by. Thank you.Angela.
LikeLiked by 1 person
Angela, thanks so much for the comment! Honestly, it’s really just for your comfort level. If you think the trailer is controllable and comfortable the way it is then I wouldn’t spend the money on a sway bar. However, the vacuum and turbulence created by a semi can be uncomfortable and would be greatly reduced with a single sway bar!
LikeLike
Thank you so much for this article. We have had or RV for about a year and taken it out over 10 times but we still get a little confused when backing in to tight campsites. Especially if everyone is looking! I echo your sentiment that people are very helpful and there is always someone there willing to get us out of a pickle. No judgement, just nice folks.
LikeLiked by 2 people
Thanks for all the tips. Its my first time . I am a single woman doing this on my own. I have a Palomino Stampede Hybrid. I keep reading advice, and greatly appreciated. But still so over whelmed. I read my manual and still very confused about the water system and the heating system, I hooked up the water and it was pouring out by the water heater. I purchased this used and privately and was not told anything. Doomed.
LikeLike
Carol, your water heater likely was drained by the previous owner using a plastic drain plug that is located inside the exterior access door at the bottom behind the burner tube. It’s a great idea to drain this when not in use so you don’t get bacteria build up in the water. Please feel free to email me any questions you may have and I’ll be glad to help!
LikeLike
Glamperlove@gmail.com
LikeLike
I did learn a couple of tricks there thanks. Remove the sway bars before backing in. good idea. Jacks are stabler when not cranked out. Now I know for sure.
LikeLike
Another thing I would add, is think of HOW you are going to use your camper..is it going to be just you and a bunch of guys using it for sports, or is your family using it as a home? How much cooking do you plan to do? Is there enough comfortable beds? Are you taking Fido..is there room for him?? All of these considerations could make or break getting your money’s worth from your unit.
LikeLike
I just purchased a 2021 Gulf Stream, what is the proper way to winterize it I’ve camper my whole life but always rented it 1st camper
LikeLike
So sorry to just now reply! I have taken a break from media during the corona outbreak. Hope you were able to get the info you needed. Every RV is different but usually draining all your fresh and black tanks, water heater (will need a 3/4″ socket and extension, and open both low point drains to start. Next you will need about 2 gallons of RV antifreeze (very cheap). You will need to bypass your water heater by closing 2 valves on the supply and hot line, then open the bypass. At your pump you will find a 2 foot length of hose. Open the valve at the base of the hose and put it in the antifreeze container and turn your 12V pump on. Next open each faucet in your camper one at a time starting at the furtherest faucet (often your outside shower). Make sure to open both hot and cold valves and don’t forget to close your low point drains before you start! Also, don’t forget your toilet!! IF you are uncomfortable doing this level of DIY, you might consider using a reputable dealer.
LikeLike
My water tank is 3/4 full I turn the pump on and it will not come out the spigots
LikeLike
Sorry to just now respond!!!! I took a break from media for a while. Hope you figured it out but sounds like you either have air in your lines and need to prime the pump or you have valves closed that should be open, perhaps after winterizing?
LikeLike